
This a a snapshot of a clip taken from the editing process on IMovie. We were looking at effects to speed up the clip. In the end, we decided to fasten up the pace. This look effective because the fast pace fitted the rhythm of the beat. We used more long and mid shots than close ups so the audience can establish where she is, what she is doing (i.e dancing) and what the animals are doing.

This is a still shot of the main actress holding a light saver in her hand. It proved difficult to make the transition of her not having a light saver in her hand to having a light saver in her hand apparent to the audience. We managed to conquer this problem and edit it to the beat. Because we filmed this shot four times, we were able to use the best shots and a variety of those shots.

We were looking for effects to put on this clip. We added 'slow motion' to the bit where the main actress is swinging the light saver beneath the animals. We were looking to put a white flash effect on when the light saver is in her hand but when we previewed it, it looked liked we put it on there for the sake of it. The flamboyant flashing lights look conceptual enough so we are going to minimize the amount of effects we add to the clips.
Tuesday 16th November

We imported the new material that we shot on saturday (our second shoot) and began to label and cut the clips up. we found we had a lot of different shots of her getting out of the box from various angles which made it easier to choose the best footage. However it was difficult to sieve through all the footage and keep to our timing limits.
Friday 19th November 2010

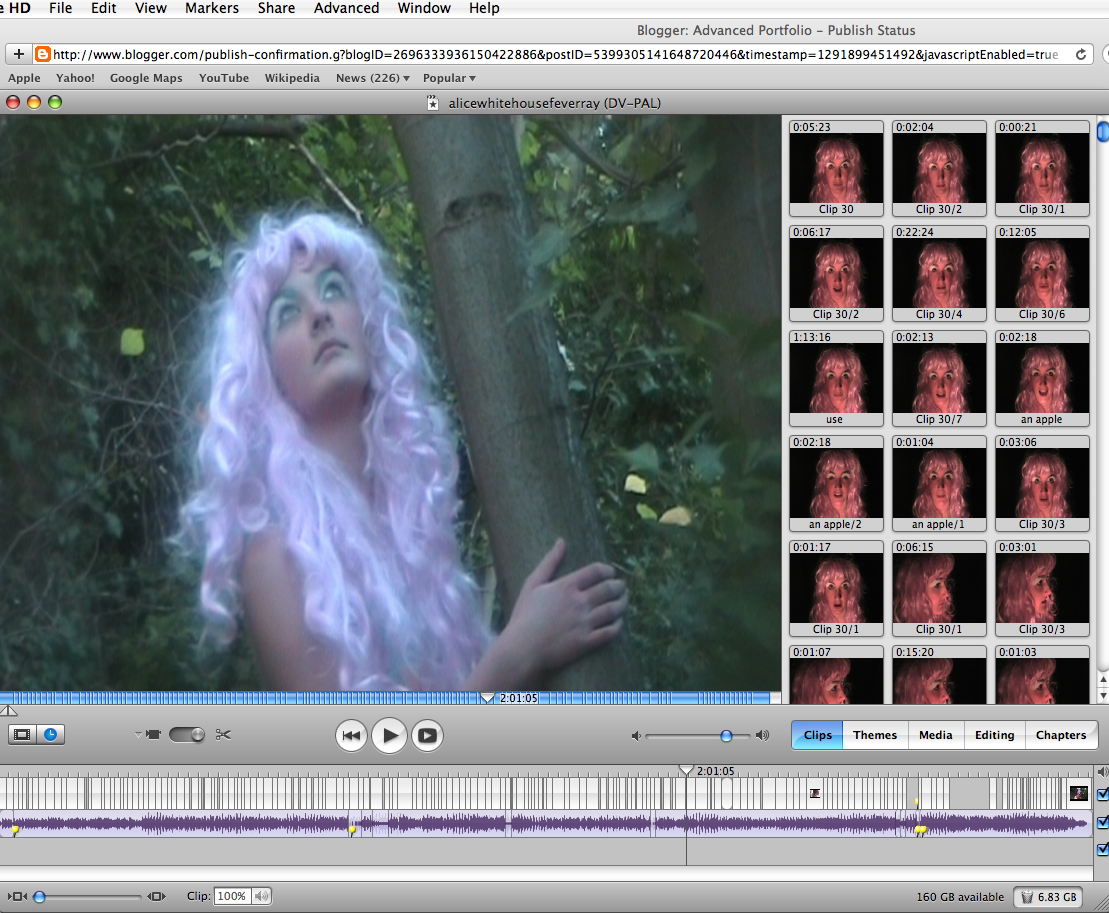
This is a still shot image of Harriet, our actress, looking around in the woods. As well as establish shots, we wanted more close up and mid shots of her exploring the woods. We were looking at effects we can put on it as well. We decided to adjust the speed of the clip to make it faster.

Whilst editing, Alice and I had conflicting opinions. For this clip, I wanted to keep to the original clip where Harriet is spreading her arm out slowly. I wanted this because it's represents 'freedom' which is also the part of the line lyrics. Alice wanted to cut the clip so she 'swings' from on side to the other. The problem with this is that it looked a bit jerky. In other words, we needed to make the transition smooth if we were to do this. We edited the clip to the beat and made her swing smoothly. This cut is noticeable but I think it is effective because it fits the beat really well.

This is the start clip. We filmed this scene last Tuesday in the drama block. We used the black heavy curtains as the background and we turned off the lights so it was pitch black. We used a torch as the source of light. The beam of light was effective because it illuminates her face so it 'lights up'. We were racing against time so the eye make-up wasn't perfect. If we had more time at lunch time, we would have spent more time on putting make-up on her eye-lids.
Tuesday 23rd November 2010

This is an over the shoulder shot from 'Harriet's' perspective. We've tried to use as much variety of shots as possible to keep the narrative interesting. This shot has made the final edit because in our opinion, it is well framed and the audience can get the idea that the badger is hiding behind the tree. It's mysterious and we see it from her point of view.

We've tried to incorporate lots of different clips of her exploring the woods. The aim is to see her travel from the box (which you can see a slight glimpse of in the background by the tree trunk) to the point where she spots the badger hiding behind the tree.

This is the point where both the Badger and Harriet meet. It's mischievous because the Badger is spying on Harriet and tries to hide from her. Prior to this, you see Harriet from the badger's point of view. We need to edit Harriet drawing closer to the badger and the badger running off to sleep with the rest of the animals. It was hard at first to edit because we had so much footage - we filmed this scene quite a lot of times. We ahd to watch the clips to see which clips would be good to select and use in our final edit. We haven't completely finished this but we will work on it further next lesson.

We thought it would be unrealistic to be traveling, exploring and singing in the woods at the same time. Not only this, it would be hard to film her lips moving as well. So we have incorporated cut off's to Harriet singing in a dark room. We looked at our initial storyboard to refer to where we planned the lip syncing to be, but we've changed it so it fits to the edit. We have changed a lot since making the storyboard and I believe they are wise decisions. We have used a close up of her face and lips for the lip syncing movement.
Targets:
1) To work on the transition between Harriet entering the woods to her seeing the Badger
2) Incorporate more lip sync
3) Review previous edited clips and see if we need to make any more improvements (e.g. fit the clip more to the beat or perhaps use a better clip)
4) If there is time, make a start with finishing the badger scene
By Ashleigh Bossman
Friday 26th November 2010

THE CHASE
Today we edited the footage of Harriet chasing the badger. Dean helped me pick out a variety of good short shots to make this part of the video exciting and dynamic as the tempo of the music also becomes more upbeat.
We found it would have been a lot easier if we had taken much more footage as trying to use lots of small shots became difficult in this part. we also found some of the shots we had taken came out a bit blurry which further limited our choices!
The actual visuals however we think are very exciting and both performers look really good on camera. Chloe especially playing the badger moves like an animal really effectively which makes the whole experience more interesting.
ALICE
TUESDAY 7 th DECEMBER

Today, the focus was on editing the scne after the 'badger chase'. It was a long process but I managed to complete it all. I stayed in at dinner for an hour to complete more on the editing, as the deadline for our music video is fast approaching. This snap shot is of Harriet laying on the floor next to the animals having chased after the badger and seeing the animals. I had to edit it so that her eyes opened when you hear the struck beat. It took a few attempts to edit it so her eyes did open on the beat but it works and it looks effective.

This clip was challenging because we had to edit the head movements to the beat of the song. I included close ups of the animals face and long shots of when the animal looks down at Harriet. The clips are in sync with the beat to the Fever ray track and it looks effective. The pace of editing is quite fast and this matches te quickened pace of the song.

I spent a long time editing this scene because I wanted to ensure enough close ups and mid shots was used. The clips have been cut very small and the pace of editing is very fast. This matches the paceness of the song at that particular part of the song. It was hard to incorporate lip syncing at this point because all we see is the animals playing with her and pushing her from side to side. I didn't want to include a cut away to distract from this action. It's quirky and playful.

This part was fun editing. We see Harriet trapped between the animals then she escapes and runs. We have incorporated different shots of this from high, low and side angle. This is the last we see of the animals. It's mysterious in a way because the audience is led to think,'what is going to happen next?' 'where is she going', and just when you think the journey is over she ends up in a garage with flashing lights.

We have use cut aways as the lip syncing. It wouldn't make sense if we made her sing whilst running through the woods. I think the cut aways are very effective and engaging.
This is the last part before she appears in the wardrobe. We didn't add any effects here. It was difficult timing the end of the woods scenes to flow into the garage scenes. We have previously edited the garage scenes and whenever we edited the wood scenes, IMovie always moved the garage scene footage. We had to place the beginning of the garage scene at a presise time -2.03 (as stated in the storyboard) and thenmake sure that the footage prior to this isn't to short or too long. I managed to conquer this problem.
Targets for Friday - Finish the lightsaver bit
Go over edited footage and mute sound clips
See if we can improve the edited clips by editing more to the beat and lip syncing
If we have time at the end of the lesson, get feedback if almost finished editing
Tuesday 14th December 2010

The badger scene was lacking close ups. Most of the footage we edited was olog shots of the chase and we thought, in able to get a high mark, that we need to add a more varitey of shots. That's partly what we worked on in today's lesson.


After gaining feedback from last lesson, one of the comments was that we add more close ups in the woods. We could see their point after watching the footage back, because it did seem too distant. We looked back on the footage for the wood scenes and we found some clips that we could incorporate into the final edit. We added more lip syncs and close ups of her face.

This is Harriet lip syncing. We added shots from a front and side view. We found it quite easy to position the clip in the right place so that it fits the 'Triangle Walks'. Beacuse we got Harriet to sing out loud when we filmed, the lip movement is at the right pace and works in conjunction with the music. The lip sync looks realistic.

We also invited Leanne, who is one of our media tecahers, to watch what we have done to our music video so far. She said it was good but the twitiching part looked like dodgy camera work. We explained that it was from the badgers perspective - as it would be realistic for a badger to twitch. To make the audience identify this, we put a clip of the badger first (as shoen in the picture above), then the badgers point of view and the a long shot of the badger moving away from the tree whilst harriet walks curiously to the tree.

This is the scene with the animals. I worked on this last lesson but we spent some time on this scene because the footage had seemed to have moved which meant the footage was off beat. Imovie seems to move clips to different times when you edit so we had to listen to the music to see where the clips were placed last time (before Imovie moved the clips). Because we had got rid of some footage in the woods and we replaced them with close ups, we ended up having more footage. According to the storyboard, some of the clips place din the middle were not on the time they were meant to be, so we had the difficult challange of deleting and cutting down previous clips.

We spent 2hours and 45 minutes of lunch trying to add close ups in the woods and move the clips we added last lesson so that they were on the beat. We managed to do this successfully.
The target for next lesson is to add effects and finish the garage scene with the light saver.
Friday 17th December 2010

Today we experimented with adding effects to our garage shots. We went through them but found that the ZOOM BLUR worked quite well with our theme and footage. Here is an example of our use of this effect, we found it added more chaos and interest plus complemented our use of colour and mise-en-scene.

Another effect we found worked well in our video was GAMMER ADJUST.
we used this for shots of the animal faces making them look more menacing and also clearer. We also found this effect worked well with the effect EXPOSURE ADJUST which you can see used below.

i really like this effect because it makes everything seem brighter and less realistic which works well with the concept of our dream-like video. Also the coloured lighting that we used on set comes out really well.
ALICE WHITEHOUSE

We added an effect on this clip to turn her face pink. We thought this would be effective as it is different and the image is bright. The flashy effect also adds to the conceptual-ness.

Close up the the flashing balls that the animals are holding and dancing around with. We added a gamma effect to make the image look soft and almost like silk.
TUESDAY DECEMBER 2010

We were working on the badger's perspective. We wanted to find a way to make the audience know straight away that this shot is from the badger's perspective and not what Leanne (media teacher) thought was dodgy camera work. We looked at the different effects on IMovie and we came across two colours that could be a possibility - Blue and Black and White.

IN THE END, WE WENT FOR BLACK AND WHITE EFFECT. THIS IS BECAUSE, WE THOUGHT IT WOULD BE MORE REALISTIC FOR A BADGER TO HAVE A BLACK AND WHITE PERSPECTIVE RATHER THAN BLUE. I ASKED A FRIEND AND SHE PREFERRED BLUE. SHE SAID THAT BLACK AND WHITE LOOK LIKE YOU WERE WATCHING SOMEONE, LIKE A POLICE CCTV CAMERA. I ASKED TWO OTHER PEOPLE AND ONE OF THEM FAVORED THE BLACK AND WHITE EFFECT. WE ASKED MEL FOR A FINAL OPINION AND SHE SAID TO GO WITH THE BLACK AND WHITE EFFECT. THIS IS BECAUSE THE BLUE LOOKED TO ZOMBIE-FYED AND A BADGER WOULD SEE BLACK AND WHITE. HOPEFULLY, WITH THIS EFFECT ADDED, IT WILL BE MORE CLEAR TO THE AUDIENCE THAT THIS IS FROM THE BADGER'S PERSPECTIVE. WE HAVE INCLUDED THIS CLIP TWICE BUT MEL SUGGESTED WE SHOULD PUT IT IN MORE TIMES.
REFLECTIVE POINTS:
WE HAVE ACCOMPLISHED QUITE A LOT TODAY. MOST OF THE EDITING IS DONE. WEGGOT FEEDBACK FROM SOME PEERS AND MEL. MEL SUGGESTED THAT WE ADD MORE CLOSE UPS IN THE GARAGE SCENE. WE DID AND I BELIVE THAT THE SCENE LOOKS A LOT TIGHTER AND INTEGRATED. BEFORE, THE SHOTS WERE DISTANT BUT WE HAVE FIXED THIS. IMOVIE MOVED THE CLIPS SO WE WERE FACED WITH THE PROBLEM OF REARRANGING THE CLIPS TO TIME SO THAT THE ENDING WAS PERFECT. FURTHERMORE, THE CD COVER HAS SHAPED UP - WE HAD FEEDBACK FROM MEL AND SHE GAVE US SOME SUGGESTIONS (TO BLUR THE EDGES OF THE PICTURE). WE BELIEVE THIS WAS BETTER THAN BEFORE, BECAUSE IT LOOKS DREAM LIKE AND PERSONAL.
ASHLEIGH
I got someone to critically evaluate our music video.
Yvonne’s feedback
· Liked the two locations. Woods and garage is appropriate
· Like the use of animals playful
· Smooth transitions from box to woods to garage to box
· Tells a story-conceptual feel
· Likes video overall but preferred blue badger’s point of view
· Liked the special effects put on it – right balance; not too much or too little
· How starts off and ends up in the same box
· Variety of shots. Didn’t notice them – didn’t think ‘that’s not complete’ or ‘that looks dodgy’

We wanted to add an effect to the lip syncing. After looking at the gallery for effects, we came across brightness and contrast and figured out that this effect would be the best one to use. This is the clip BEFORE we added the effect.

This is how the clips looks AFTER the effect was added.

We wanted to make this clip look more apparent and obvious that it was from the badger's perspective. We added the effect 'PEEPHOLE' to create the illusion that it was from the badger's eyeball/perspective.

This is how the clips looks AFTER the effect was added.

The effect we added on this clip was brightness and contrast. It made the animals faces brighter than the original clip.

Link to the final version on Youtube: Better Quality
Friday 14th January 2011
After asking AS and our A2 class for feedback on the music video :
We scored an average of 32 MARKS!!!
The lowest - 29 marks
Highest - 40 marks
This is great and fantastic that the majority of people like it. Below is a few comments that was written:
Positive:
· Lighting was great
· Dream idea matched song and second half was good.
· Good narrative and mise-en-scene
· Very interesting to watch
· The end part and the strobes was great.
In between:
· Confusingly random – was given a 32 mark
· Very weird
Negative :
· Didn’t understand the video
No comments:
Post a Comment